
Pull back the mulch on any weed-riddled garden bed, and you’ll usually find the culprit right away: fabric that was rolled out in a hurry, never overlapped, and stapled down with a lick and a promise. Landscape fabric works, but only when it’s installed the right way, and that’s the part most tutorials skip.
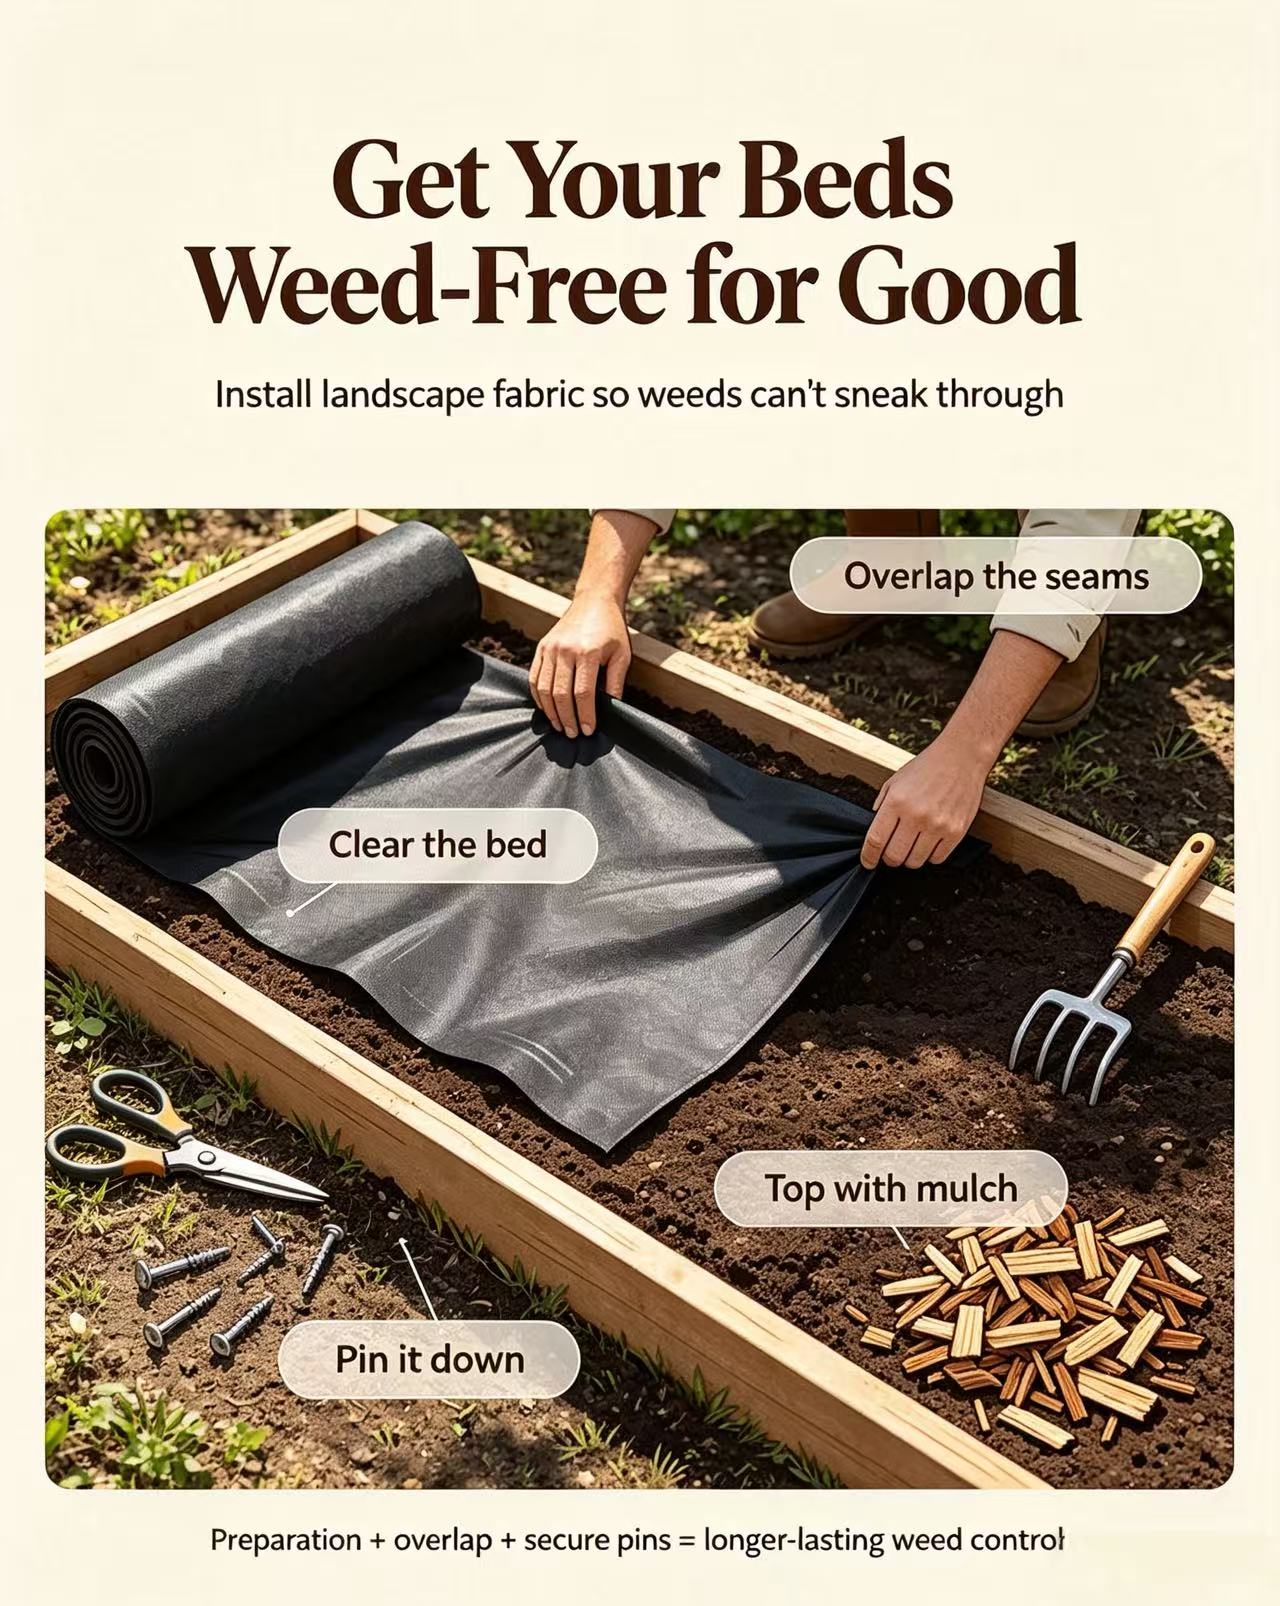
Getting it right isn’t complicated. It just takes knowing the few details that really matter. We’ll walk through how to install landscape fabric from start to finish—clearing the bed, cutting and overlapping seams so weeds can’t sneak through, pinning it down so it stays put, and topping it with mulch or gravel for a finish that holds up. Grab your gloves and get your beds weed-free for good.
Tools and Materials You’ll Need for Landscape Fabric Installation
A little prep here saves you a lot of frustration later. This is not the step to rush through.
Choosing your fabric is the first real decision. If you’re covering a garden bed or flower border, go with non-woven landscape fabric. It’s lighter and does a fine job suppressing weeds while still letting water through. But if you’re working on a driveway, path, or rock bed, reach for woven landscape fabric instead. It’s the tougher, more durable option, built to handle heavy use and erosion. Matching the weave to the job matters more than brand in the landscape fabric vs weed barrier debate.
Your shopping list:
-
Landscape fabric (woven or non-woven, depending on project)
-
Landscape fabric staples or pins: 6-inch staples for level ground, 8-inch for slopes or clay soil
-
A sharp utility knife or heavy fabric shears for clean cuts around plants and curves
-
A garden rake or hoe to clear and smooth the soil first
-
A rubber mallet or small hammer to seat pins flush without bending them
-
A tape measure for layout and planning overlap
-
Optional: a trowel for tight edges, a wheelbarrow for hauling mulch or gravel, and gloves to save your hands
How much to buy: Measure your bed’s length times width for square footage, then add 10% for trimming and overlap. A 100-square-foot bed means buying around 110 square feet of fabric. Plan for 6–12 inches of overlap at every seam, and budget roughly one pin per square foot. Space them 6–12 inches apart along edges and seams (skip stapling the center; it creates tension). For topping it off, figure 2–3 cubic yards of mulch per 100 square feet at a 2–3 inch depth. More than 4 inches can smother the fabric’s effectiveness.
Step 1: Prepare and Clear the Installation Area
Skip this step, and everything else you do will eventually come undone. A weed that’s cut off at the surface but left rooted underneath will push right back up through your fabric within weeks, no matter how carefully you’ve laid everything else out.
Start by pulling every weed you can find, roots and all. Hand-pulling works fine for soft growth, but anything with a woody stem or a deep taproot needs a shovel. Cutting it at ground level isn’t enough. If the root mass is still down there, it’ll find its way back up.
Next, clear out rocks, old mulch, sticks, and any construction debris left behind from a previous project. A garden rake makes quick work of this. You want the soil underneath completely bare.
Fixing the ground itself matters just as much as clearing it. Walk the bed and look for low spots and high humps. Fill depressions with soil, then tamp them down—a hand tamper or even the flat side of a shovel works for small beds. Shave down raised areas so the whole surface sits level. A straightedge or level laid across the bed will show you spots you’d otherwise miss by eye.
If you’re prepping a rock bed, this leveling step is non-negotiable. Rocks sitting on an uneven base will shift and settle unevenly over time, and no amount of fabric underneath fixes that. Flower beds need the same care, just with more attention to loose organic matter and lingering roots near existing plants.
Step 2: Measure, Cut, and Lay the Landscape Fabric
A tape measure is your best friend here. Measure the length and width of your bed, multiply for square footage, then add extra fabric on every side—enough to secure the edges and overlap seams properly. Most weekend gardeners get impatient at this point and skip straight to unrolling. Don’t. The five minutes you spend measuring now saves you from a mid-project fabric shortage later, and running out halfway through a bed is its own special kind of frustrating.
Clean cuts matter. Lay the fabric flat on a clean surface—your driveway, a tarp on the lawn, whatever’s available—before you cut anything. Mark your lines with pencil or chalk first, then follow them with a utility knife or sharp scissors, using a straightedge for anything that needs to be perfectly straight. Cut a little generous rather than exact. You can always trim excess fabric once it’s in place, but you can’t stretch a piece that came up short.
Check the orientation before you lay it down. Some landscape fabrics have a marked top side; others need the fuzzy side facing down so it can hold moisture against the soil. Read the packaging. Manufacturers vary on this, and guessing wrong means pulling everything back up and starting over.
For big beds, roll the fabric out starting from the center and work your way toward the edges. This keeps the sheet flat and settled instead of bunching up in awkward folds. Smooth out wrinkles as you go so the fabric makes full contact with the soil beneath it—air pockets underneath just invite weeds to find a way through.
How Much Overlap Landscape Fabric Needs
If your bed is wider than one roll, you’ll need multiple strips. Landscape fabric overlap needs at least 6 inches where two pieces meet, though many pros push for 12 inches on beds where weed pressure is heavy. Skimping here is exactly how gaps open up at the seams, and gaps are precisely where weeds find their opening. Lay one strip, secure it, then overlap the next by that same margin before moving on—don’t try to eyeball tight, edge-to-edge fits. Straight, generously overlapped seams are what keep this whole system airtight.
Step 3: Overlap Seams to Prevent Weed Growth
A gap the width of a pencil is enough for a dandelion seed to find its way through. Once it roots, no amount of mulch on top will stop it. The overlap is what makes the fabric work.
The industry standard:
-
6 inches – the absolute minimum. I’d only use this on a calm, flat flower bed with low weed pressure.
-
6–8 inches – the sweet spot for most garden beds and typical landscape fabric jobs.
-
8–12 inches – reserve this for loose soil, gravel, driveways, slopes, or anywhere weeds have been a nightmare. Some rock bed installers won’t go below 10 inches (roughly 100mm) as their floor.
When working with multiple strips, lay your first piece along the longest edge or the direction water flows. Overlap each new strip on top of it, never underneath. On a slope, the uphill piece should always lap over the downhill piece, just like roof shingles. That way rain runs across the seam and off, instead of finding a crease to slip under and pry open.
Once your seams are set, pin them down right away. Space fasteners about 12 inches apart along every seam, then 12–18 inches along the outer edges. For larger, open areas, toss in an extra pin every 24 inches or so to keep the fabric from lifting or shifting once soil and moisture start working on it.
Step 4: Cut Openings Around Existing Plants and Fixtures
Existing trees, shrubs, and fence posts don’t disappear just because you’re laying fabric. You have to work around them, and this is where a lot of DIY jobs go sideways.
For round stems and posts, find the center point and mark it with an X. Cut a small pilot hole first, then slice outward in a star pattern toward your traced outline. Cut slightly smaller than you think you need. You can always trim more away, but you can’t add fabric back once it’s gone.
For irregular shapes like a cluster of perennials or an oddly placed sprinkler head, press the fabric down lightly first and mark where it touches. That imprint becomes your cutting guide.
Test-fit before you commit to the final cut. Slide the fabric around the base, check for gaps, then enlarge in small increments until it sits snug against the stem.
One trick worth stealing from other trades: subtract about 1/8 inch from your measurement before cutting. That tiny margin keeps the opening tight enough that weeds can’t slip through the edges, whether you’re working in a flower bed or a rock bed.
Step 5: Secure the Fabric with Staples or Pins
Do corners first, then edges, then seams. Lock the four corners down and you’ve anchored the whole sheet before tension has a chance to pull it sideways. Skip that order and you’ll spend the afternoon chasing wrinkles.
Spacing that works:
-
Edges: a pin every 8–12 inches
-
General areas: every 12–18 inches
-
Windy spots: tighten to 6–12 inches
-
Center of the fabric: one every 2–3 feet, closer if the ground’s uneven
Edges and seams need the most attention. They’re exposed, so wind grabs them first, and that’s where shifting starts.
For landscape fabric staples, U-shaped ones (6–8 inches) grip loose or sandy soil best. In clay or compacted ground, flat-top pins hold better. If your pins keep bending, your soil’s too hard for that fastener; switch types before you keep fighting it.
Press fabric flat against soil as you pin, no air, no flapping. At seams, staple through both overlapping layers together so they can’t separate later.
Step 6: Cover the Fabric with Mulch or Gravel
Bare fabric baking in the sun is living on borrowed time. UV rays break it down fast, and once it’s brittle, it tears, shifts, and stops doing its job. This cover layer is what makes everything you just did last.
For garden beds, spread organic mulch (bark, straw, wood chips) at 2–3 inches deep. Go thicker and you risk smothering the fabric’s effectiveness; thinner, and sunlight sneaks through. Keep mulch pulled back about 1 inch from stems and trunks. Piling it against the base invites rot and pests, and nobody wants that after all this work.
For rock beds and decorative stone, 1–2 inches can work for pure decoration, but if you’re building a path or driveway base, plan on 3–6 inches of compacted gravel or crushed rock. One practical guide even recommends a 4–6 cm rock layer as the sweet spot for durability.
Don’t dump a wheelbarrow load in one spot and call it done. Small piles, raked to an even depth, give you a much cleaner result than shoveling and hoping it spreads itself.
Also, keep the mulch or gravel clean. Mixing in loose soil hands weed seeds a place to germinate right on top of your barrier, which defeats the entire purpose of installing landscape fabric in the first place.
Check your edges last. Cover should reach right up to the pinned borders, with no exposed fabric peeking through anywhere.
Common Installation Mistakes and How to Avoid Them
Every gardener has a story about the project that went sideways, and with weed barrier fabric, the mistakes tend to repeat themselves in predictable ways.
Skipping the weed check tops the list. Leave roots in the soil, and they’ll push right through your fabric, lifting it in bumps and pockets within weeks. Walk the bed one more time before you lay anything down.
Thin overlaps cause the second-most-common headache. Less than 6 inches at a seam invites water underneath, and that’s where edges curl and gaps open.
Not enough landscape fabric pins or staples is the third culprit. Skimping on fasteners at corners and seams lets wind get under the material and lift it right off the ground.
Leaving fabric exposed without mulch or gravel on top ages it fast. UV light breaks it down within a season, and once it’s brittle, it tears.
Uneven ground underneath causes uneven wear everywhere else, so smoothing depressions before you install weed mat saves you from chasing wrinkles later.
Before calling it finished, run through a quick check: cleared soil, solid overlaps, enough pins, full coverage, level ground. Catching these now beats redoing the whole bed later.
Frequently Asked Questions About Landscape Fabric Installation
Once the fabric’s down and the mulch is spread, a few questions keep popping up.
Does landscape fabric actually work? Yes, but installation has to be careful: level the soil, seal the seams, use enough pins, and cover everything on top. Skip any of those, and it’s fighting a losing battle.
Can I use it around existing plants? Yes. Slit the fabric from the edge to the base of the plant, then lay a small overlapping strip over the cut so no soil peeks through.
How long does landscape fabric last? Some products are rated for seven years, but sun exposure, foot traffic, and soil buildup on top all shorten that time in real-world use.
Is there a downside? If seams are left open or the fabric is uncovered, weeds find their way in. And too much soil or mulch piling on top can smother the barrier, letting weeds root right into that debris layer.
Conclusion
Installing landscape fabric is one of those small, satisfying projects that pays you back for years. Get the overlap right, pin the edges down snugly, and top it all with a good layer of mulch or gravel. You get a weed-free garden that needs way less weekend labor.
Rushing the seams or skimping on stakes is where most weed barrier installs go wrong. Slow down, overlap generously, and secure everything like you mean it.
Now go grab your gloves and give it a try.


0 Comments